Upgrading PHP Version and MariaDB Version in XAMPP - A Step by Step Guide
By: Joseph de Souza
XAMPP is a widely used tool for developing websites offline in a local environment (localhost). It is also used for testing upgrades to many online CMS and other applications based on the AMP stack. Since there have been no new releases of XAMPP for a long time and MariaDB version present is already unsupported, I will show you how to manually upgrade XAMPP. For this tutorial I am going to use XAMPP Version 8.2.12 which contains PHP Version 8.2.12 and MariaDB version 10.4.32. In case you already have databases created, please back them first in the sql format using phpmyadmin.
You can also check out the tutorials on database management. The first part of the tutorial explains how to create new MySQL databases as well as users and assigning privileges to users.The second part deals with inserting editing or deleting data From MySQL database using phpMyAdmin.
How to Upgrade the PHP Version in XAMPP to 8.3
Downloading the Correct Version of PHP 8.3
Firstly download the zip version of PHP 8.3.10 (VS16 X86 64bit thread safe) from the php.net website.

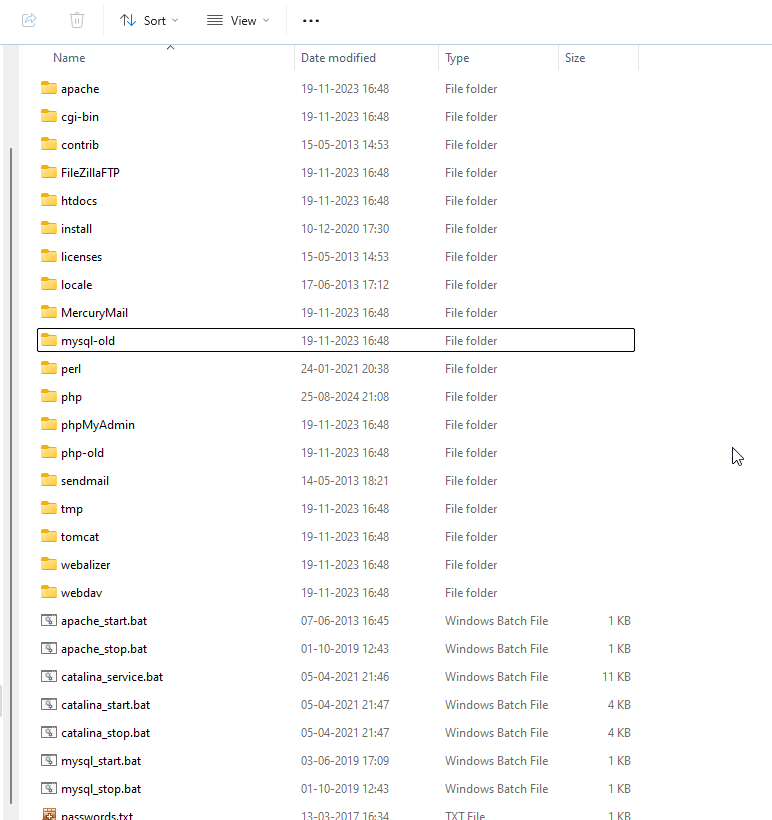
Next rename the existing php folder in XAMPP as php-old. Then create a new folder and name it as php.

Unzip the contents of php-8.3.10-Win32-vs16-x64.zip that you have just downloaded into the php folder that you have just created.

Creating and Configuring the New PHP.ini
Make a copy of php.ini-development and rename to php.ini. Specify the extensions directory in php.ini
; On windows:
extension_dir = "\xampp\php\ext"

Next enable mysqli and mbstring extensions in php.ini if not yet enabled by removing the semicolon (;) before the extensions. Some other extensions have also to be enabled. They are curl,intl, exif , openssl, zip in a similar manner.
The PHP upgrade is now complete and is now PHP 8.3

How to Upgrade the MariaDB Version in XAMPP to 10.6
Downloading the Correct Version of MariaDB 10.6
Firstly download the zip version of MariaDB 10.6.19 (64-bit X86 ) from the mariadb.com website.
Select show all files after selecting the version and then download MariaDB 10.6.19

Next rename the existing mysql folder in XAMPP as mysql-old. Then create a new folder and name it as mysql.

Unzip the contents of mariadb-10.6.19-winx64.zip that you have just downloaded into the mysql folder that you have just created.

Setting up MariaDB
Copy backup and data folders from mysql-old to new mysql folder. Next copy my.ini from mysql-old bin folder to mysql bin folder.
Delete all loose files in the root folder of mysql/data. Also delete the phpmyadmin folder in mysql/data. This is shown in the screenshot below.

Recreating the PhpMyadmin Database
Recreate the phpmyadmin database from file: xampp/phpMyAdmin/sql/create_tables.sql by running the queries in the SQL tab

The output on running the SQL queries to recreate the phpmyadmin database is shown below

MariaDB upgrade is now complete as seen in the screenshot below.

Recreating your Databases in the new version of MariaDB
If you had created any databases in the old version you need to first delete them just as you deleted the phpmyadmin database. Firstly shut down both the servers (web and database). Next you need to make changes in PHP.ini . This is done to avoid time outs and other errors when recreating the database.
upload_max_filesize = 100M
post_max_size = 100M
memory_limit = 256M
max_execution_time = 240
max_input_time = 240
Then modify phpMyAdmin Configuration. Find the config.inc.php file in your phpMyAdmin directory. It will be in \xampp\phpMyAdmin\config.inc.php
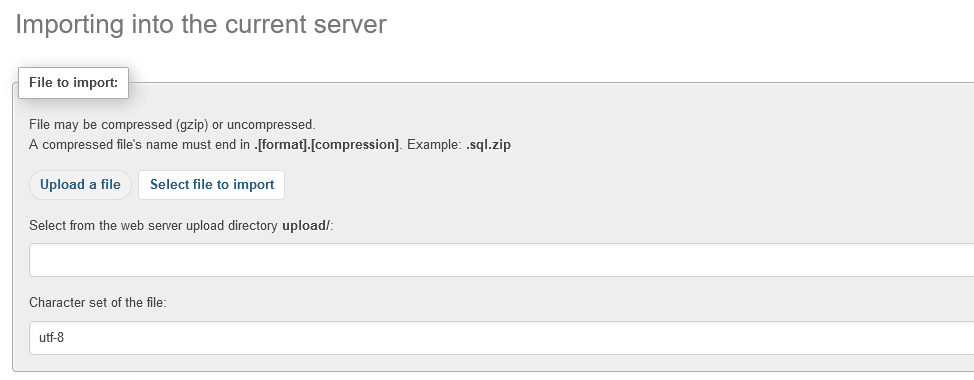
Add or modify the $cfg['UploadDir'] line to set an upload directory:
$cfg['UploadDir'] = 'upload';

Create a directory in the phpmyadmin folder and name it as upload.
Then upload the sql file of your database in this folder and import it by clicking on select file to import

About The Author
Joseph de Souza is a leading Freelance SEO consultant and Web developer in Goa, India with more than 17 years of experience in internet marketing.
He has a proven track record and has has helped several companies increase their traffic many times over and thereby increase their revenue and profits.
Besides English, Joseph has also successfully optimized two German language websites and a Danish language website and obtained outstanding results.
[Read full bio]
