Data Management In MySQL Databases Using phpMyAdmin
By: Joseph de Souza
PhpMyAdmin provides several functions to manage data in MySQL databases. This part deals with inserting, editing or deleting data from a MySQL database using phpMyAdmin. The first part of the tutorial explains how to create new MySQL databases as well as users and assigning privileges to users.
Deleting Or Editing Data From MySQL Database Using phpMyAdmin
PhpMyAdmin can be used to edit or delete data from a MySQL database. After logging in we have to select the database for
which we want to edit or delete data.
Once we have opened a table of the MySQL database for browsing, editing or deleting a row or rows, multiple rows of data of the selected table will be displayed as shown in the screenshot below.
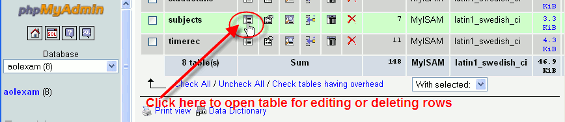
To edit a single row we have to click on the pencil icon besides that particular row and for deleting that row we
have to click on the red X icon besides that row.
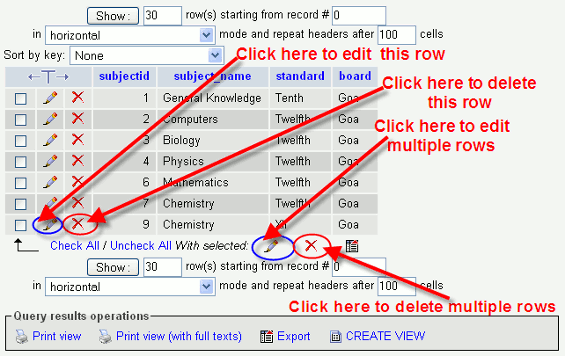
To edit or delete multiple rows we have to select the required rows by
clicking on the check boxes besides them and then click on the pencil icon or on the
red X icon respectively at the bottom for editing or deleting as shown in the screenshot below.
Inserting Data In A MySQL Database Using phpMyAdmin
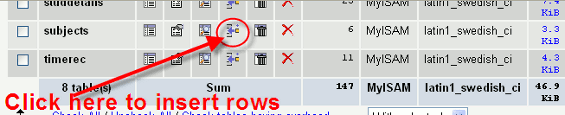
phpMyAdmin can also be used for adding rows to the database table. Instead for opening the table in browse mode as seen earlier where we have selected the browse mode and then proceeded to edit or delete rows,
we have to open the table in Insert mode and then add rows to the selected table.
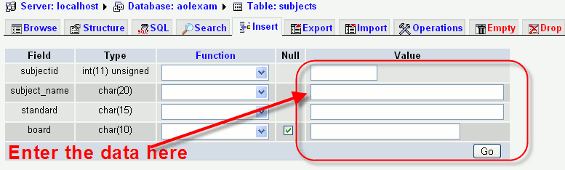
To enter a new row of data we have to enter the values of each field next to it
as indicated in the screenshot below. After entering all the fields click on the GO button.
About The Author
Joseph de Souza is a leading Freelance SEO consultant and Web developer in Goa, India with more than 15 years of experience in internet marketing.
He has a proven track record and has has helped several companies increase their traffic many times over and thereby increase their revenue and profits.
Besides English, Joseph has also successfully optimized two German language websites and a Danish language website and obtained outstanding results.
[Read full bio]